Step-by-Step Integration Process
If you have already integrated SIGN IT or SIGN FR, the initial setup steps in this guide will likely be familiar and may already be completed. In that case, you can jump straight to Step 10 to review the additional steps required.
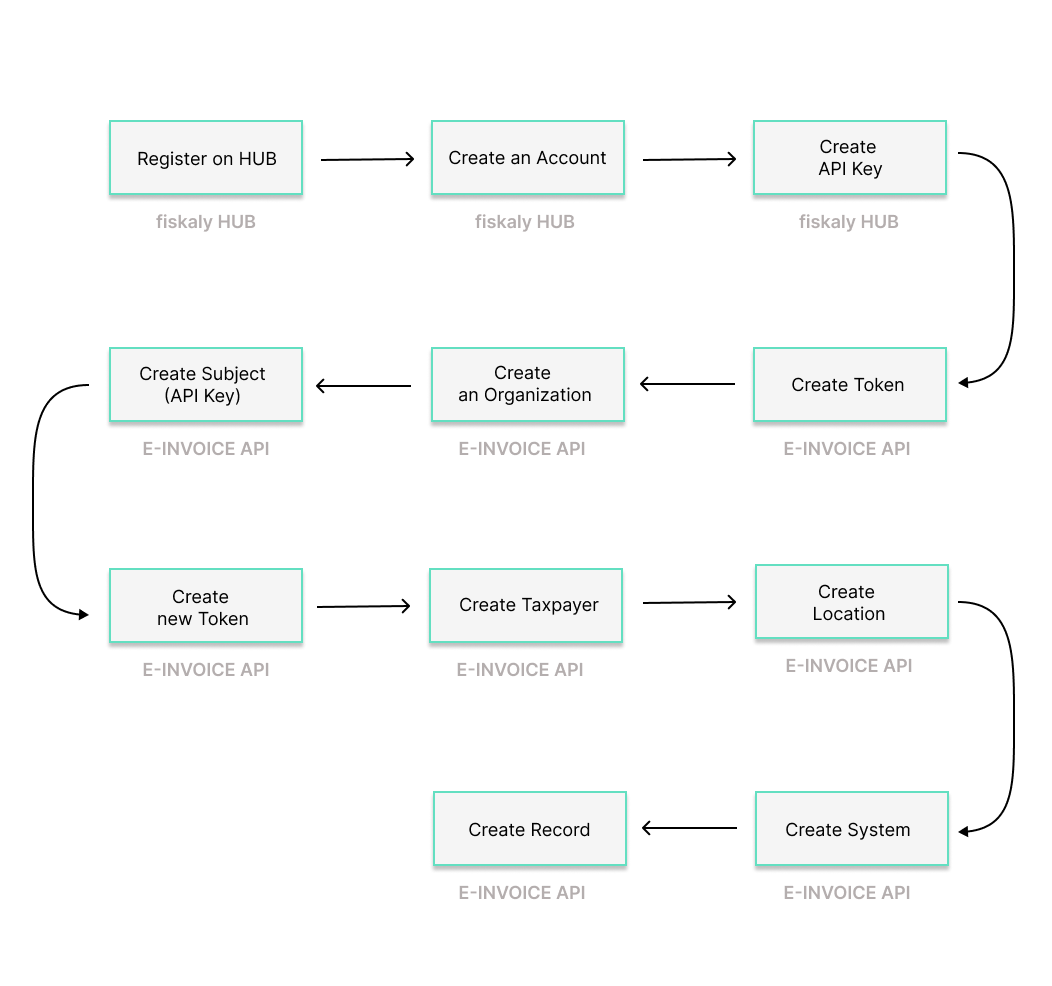
To begin the e-invoicing integration process, follow the step-by-step instructions outlined in this section. The accompanying diagram illustrates the workflow and highlights the essential steps required to complete the e-invoicing integration.
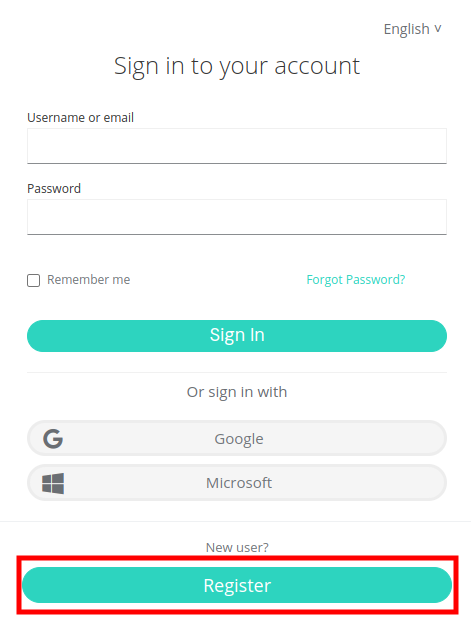
Step 1: Register on HUB
Begin by registering on the HUB.
Step 2: Create Account & Group
Creating a fiskaly Account is the first step, after which you can proceed with setting up the first organizational structure for your business and generating your API Key.
The Account represents the PoS provider or a retailer that operates its own PoS system. It is the top-level organization in the structure.
After creating your fiskaly Account, you will be taken to the Organization Selector where you can create your Group. A Group is an intermediate level within an Account that helps you organize multiple Units into logical clusters.
Step 3: Create API Key
The next step is to generate an API Key for your Organization via the HUB within your Group. This API Key and Secret pair is required to create your first Organization of type UNIT (Step 5).
Note that API Keys generated in the TEST environment will create TEST resources, while those from the LIVE environment will create LIVE resources.
Step 4: MANAGEMENT - Create Token
Begin using the E-INVOICE API through the createToken endpoint. You will need to create a token to authenticate for the next steps.
Step 5: MANAGEMENT - Create an Organization UNIT
Continue by creating an Organization of type UNIT through the createOrganization endpoint. A UNIT represents a single legal entity (merchant). You will need to create one UNIT for each taxpayer representation you manage.
When creating your first Organization of type UNIT, ensure it is associated with your Account created via the HUB. To do this, use the token generated from the API keys created for your Account. This reflects the hierarchical structure where the UNIT is nested under your Account.
Step 6: MANAGEMENT - Create Subject (API Key)
Create a Subject of type API_KEY through the createSubject endpoint. The connection between the Organization UNIT and the API Key is established via the X-Scope-Identifier(using the id of the newly created Organization).
Step 7: MANAGEMENT - Create new Token
Next, create a token that will be used to create resources within the corresponding Organization UNIT.
Step 8: OPERATION - Create Taxpayer
You are now ready to create the Taxpayers required for e-invoicing. To do so, use the createTaxpayer endpoint. You will need to set the Taxpayer of type COMPANY.
Depending on the country, the required fiscalization setup and required taxpayer data may differ, so please refer to the dedicated country guides:
Once you create a Taxpayer of type COMPANY, its state will be set to ACQUIRED. In order to be fully functional, the state has to be updated to COMMISSIONED using the updateTaxpayer endpoint.
When calling the createTaxpayer endpoint a Location of type HEAD_OFFICE is automatically created. You can confirm this via the listLocations endpoint.
Step 9: OPERATION - Create Location
New customers integrating e-invoicing only may skip this step.
For receipt fiscalization, you need to create a Location of type BRANCH via the createLocation endpoint for each business location.
When you create a Location of type BRANCH, its state is initially set to ACQUIRED. In order to proceed, you need to change the state to COMMISSIONED using the updateLocation endpoint.
Step 10: OPERATION - Create System
The createSystem endpoint is used to create an abstraction of a system used for fiscal operations.
Depending on your setup, the following applies:
-
New customers using only e-invoicing: create a single
E_INVOICE_SERVICESystem (only one per Taxpayer) and link it to theHEAD_OFFICELocation that was automatically created for you in step 8. -
New customers using receipt fiscalization and e-invoicing: create
FISCAL_DEVICESystems for receipts and one additionalE_INVOICE_SERVICESystem (one per Taxpayer). Link theE_INVOICE_SERVICESystem to the Location of typeHEAD_OFFICE, and link theFISCAL_DEVICESystem(s) to a Location typeBRANCH. -
Existing customers with commissioned fiscal devices adding e-invoicing: create one additional
E_INVOICE_SERVICESystem and link it to the Location of typeHEAD_OFFICE. When a Taxpayer is created, a Location of typeHEAD_OFFICEis automatically generated with the same ID. This can be verified by listing your Locations.
When creating a System, its initial state is set to ACQUIRED. In order to proceed, you need to change the state to COMMISSIONED using the updateSystem endpoint.
When commissioning an E_INVOICE_SERVICE System, it is expected to transition to COMMISSIONED state and DEGRADED mode.
To enable OPERATIVE mode for the E_INVOICE_SERVICE System, you must upload the Proof of Ownership PDF via the createRecord endpoint, using a Record of type INTENTION and operation of type UPLOAD.
The submitted document will then be reviewed and verified, which can take up to 72 hours. Once verification is complete, the System will automatically transition to COMMISSIONED state and OPERATIVE mode.
Step 11: OPERATION - Create Record
Creating a Record in the E-INVOICING API will always require two subsequent calls:
- Part A)
INTENTION- at the start of the e-invoicing process - Part B)
TRANSACTION- once the e-invoice data is complete
For each e-invoicing operation, first call the createRecord endpoint to register the intention to issue an electronic invoice.
A Record of type INTENTION will contain the following information:
- Association with the
E_INVOICINGSystem that will be used to issue the e-invoice - Operation of type
TRANSACTION, indicating that the System intends to perform an e-invoicing operation.
Next, call the createRecord endpoint again to create a Record of type TRANSACTION and operation type INVOICE. This transaction is associated with the internal identifier of an already created Record of type INTENTION and it contains the electronic invoice data.
For e-invoicing, the recipient must be a BUSINESS recipient and you must populate the invoicing block (recipient.invoicing.type = PEPPOL and recipient.invoicing.identifier with the PEPPOL Network Identifier), otherwise the e-invoice cannot be issued.
Once the Transaction is successfully processed, the electronic invoice is created and handled according to the applicable e-invoicing requirements. Country-specific behavior and any additional data requirements are described in the dedicated guides.
All Records created in the LIVE environment are legally valid, therefore, they must always represent real and valid business transactions.