Step-by-step Integration
To begin the integration process, please refer to the detailed step-by-step instructions provided here.
The accompanying diagram illustrates the workflow and highlights the essential steps necessary to successfully complete your integration, for which you will need to utilize our SIGN IT.
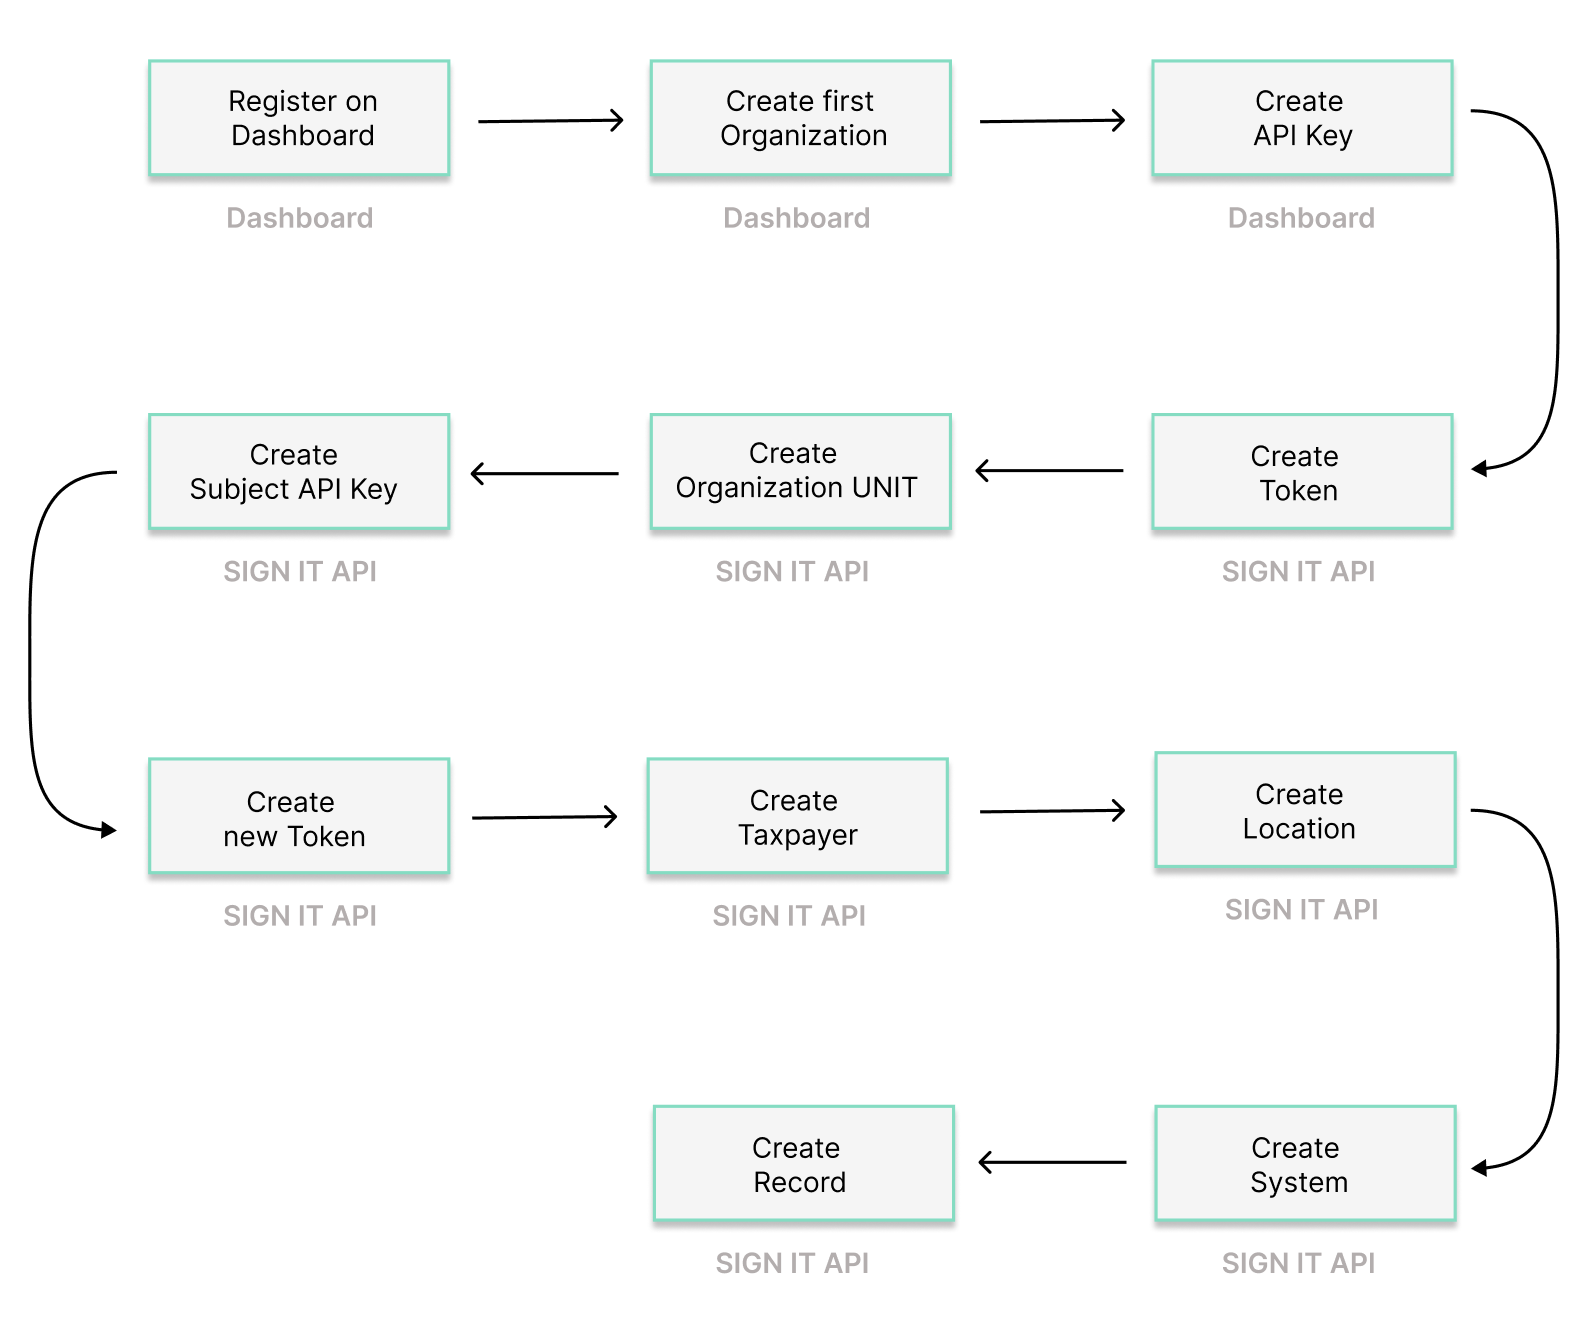
Step 1: Register on Dashboard
Begin by registering on the Dashboard.
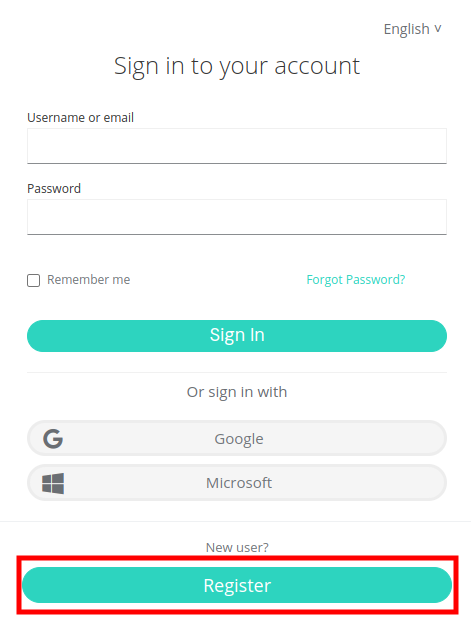
Creating a fiskaly account is the first step, after which you can proceed with setting up the first organizational structure for your business and generating your API Key.
Take a look at our video for a step-by-step explanation on how to set up your account and first organization.
Step 2: Create first Organization
Continue with creating your first Organization using the Dashboard. In the SIGN IT API, this corresponds to an Organization of type GROUP and will represent the POS provider or retailer with its own POS system.
Step 3: Create API Key
The next step is to generate an API Key for your Organization via the Dashboard. This API Key and Secret pair is required to create your Organization(s) of type UNIT (Step 5).
Note that API Keys generated in the TEST environment will create TEST resources, while those from the LIVE environment will create LIVE resources. For further details, refer to our article on TEST and LIVE environments.
Starting from the next step, you will be utilizing our SIGN IT API. You may download our Postman collection for SIGN IT, which could facilitate your integration moving forward with the next steps.
Step 4: MANAGEMENT - Create Token
Begin using the SIGN IT API through the createToken endpoint. You will need to create a token to authenticate for the next steps.
Step 5: MANAGEMENT - Create Organization UNIT
Continue with creating an Organization of type UNIT through the createOrganization endpoint. You will need to create one Organization UNIT for each of your taxpayer representations.
When creating an Organization of type UNIT, ensure it is associated to the Organization of type GROUP you previously created via the Dashboard. To do this, use the token generated from the API keys created for your Organization of type GROUP. This reflects the hierarchical structure where the Organization of type UNIT is nested under your Organization of type GROUP.
Step 6: MANAGEMENT - Create Subject API Key
Create a Subject of type API_KEY through the createSubject endpoint. The connection between the Organization of type UNIT and the API Key is established via the X-Scope-Identifier(using the id of the newly created Organization).
Step 7: MANAGEMENT - Create new Token
Next, create a token that will be used to create resources within the corresponding Organization of type UNIT.
Step 8: OPERATION - Create Taxpayer COMPANY or INDIVIDUAL
Now you’re ready to create the operational parts required for fiscalization in Italy. To do so, use the createTaxpayer endpoint to create the representation of a taxpayer as follows:
- You will need to set the Taxpayer as a type
COMPANY(legal entity) orINDIVIDUAL(natural person). In both cases, thenameand theaddressmust be provided. - Within the Italian
fiscalizationinformation, the following taxpayer data must be provided:tax_id_number: Italian Fiscal Code (Codice fiscale) of the businessvat_id_number: Italian VAT Number (Partita IVA) of the businesscredentials: pin, password and tax id number of the Fisconline user required to access AdE’s services
Once a Taxpayer of type COMPANY or INDIVIDUAL is created, its state is set to ACQUIRED by default. In order to be fully functional, the state has to be updated to COMMISSIONED using the updateTaxpayer endpoint.
Only Fisconline credentials are valid for using SIGN IT lite. The taxpayer must manually do an initial log in to the Revenue Agency's web portal in order to ensure that the credentials work properly and to accept the terms, conditions and additional clauses provided.
The credentials must be updated every 60 days. For more information, please refer to our Credentials section.
For a detailed Merchant Guide on how to request Fisconline credentials, please contact our sales team.
Step 9: OPERATION - Create Location
For each operating business location, you need to create a Location of type BRANCH via the createLocation endpoint.
Once a Location of type BRANCH is created, its state is set to ACQUIRED by default. In order to proceed, you need to change the state to COMMISSIONED using the updateLocation endpoint.
Step 10: OPERATION - Create System
The createSystem endpoint allows you to create an abstraction of every Electronic Recording System (ERS) used for fiscal operations. Every cash register or point of sale needs to be provided as a new System of type FISCAL_DEVICE.
- A System will be connected to a specific, previously created
Locationof typeBRANCH. - For each System of type
FISCAL_DEVICE, you will also need to provideproducerandsoftwareinformation to properly track which device is performing fiscal transactions. For more information, please refer to this FAQ article.
Once a System is created, its state is set to ACQUIRED by default. In order to create Records, its state must be updated to COMMISSIONED using the updateSystem endpoint.
Step 11: OPERATION - Create Record
For each business operation carried out in the System, the createRecord endpoint must be used in two subsequent calls: the first call records the intention to start the transaction, and the second call provides the transaction data.
Creating a Record in the SIGN IT API will always require two subsequent calls:
- Part A)
INTENTION- right at the beginning of the sale process - Part B)
TRANSACTION- directly after the payment process
A Record of type INTENTION will contain the following information:
- Association with the System that will carry out the transaction
- Operation of type
TRANSACTION, representing the System's intent to record a transaction
A Record of type TRANSACTION is associated with a previously created Record of type INTENTION and can be used to carry out one of the following operations in Italy:
-
RECEIPT: This operation type is used to represent the sale of a good or service and includes information such as:- Document details, e.g. document number, activity code (if applicable), transaction date and total amounts (including and excluding VAT)
- Details for each entry or line item sold, such as:
- Identification of a
SALE - Description
- Indication of whether it is a
GOODorSERVICE - Etc.
- Identification of a
-
CORRECTION: This operation type is used to represent a return process. It contains the same data as aRECEIPToperation and, in addition:- A reference
idto an already created receipt (the original transaction document)
- A reference
-
CANCELLATION: This operation type is used to invalidate an entire transaction. To do so, theidof a previously created record must be provided.
In all cases, once the transaction is properly recorded and the commercial document information is successfully transmitted to AdE's web portal (state COMPLETED, mode FINISHED), the compliant response from the record creation indicates the progressive number assigned by AdE to the commercial document (compliance.data) and, if provided in the payload, the consumer’s Lottery Code.
All records created in the LIVE environment are transmitted to the Tax Authorities and generate valid commercial documents. Therefore, these documents must always reflect actual transactions.